
Looking to refresh the look of your home?
Then you can definitely try out these wall art inspirations that you can make on your own. With just a few materials you can easily find and some tools, you will be able to make art to refresh your walls all at the grasp of your fingers. Whichever color, whichever style you prefer, watch your room come alive once more with your DIY art!
Here are the wall inspirations you can use:
- Wall-Hanging Rope Art

Materials:
- cotton rope
- paints
- cardboard
Tools:
- scissors
- hot glue gun
- paint brushes
Instructions:
- Cut a piece of cardboard to the measurement of your choice.
- Then, measure out pieces of rope and spare 2-3 inches longer than the length of the cardboard.
- Glue down all pieces of rope side-by-side to cover the cardboard.
- Press the rope extremely close together to get a perfect rope canvas.
- You can leave the ends ragged, but feel free to trim for a cleaner look once all the pieces are secure.
- Create the perfect combination of colors and squeeze the paint onto a plate.
- You can be as creative as you want, but we recommend to look of your rope canvas as a grid. Divide it into stripes, squares, rectangles and triangles.
- Size is also something you can change to your liking, as you can try creating the same pattern in different sizes.
- Don’t worry about painting the rope perfectly. There is a rawness in the texture of the rope showing through the paint.
- Pick a pattern for inspiration and start painting!
2. DIY Frame Gallery
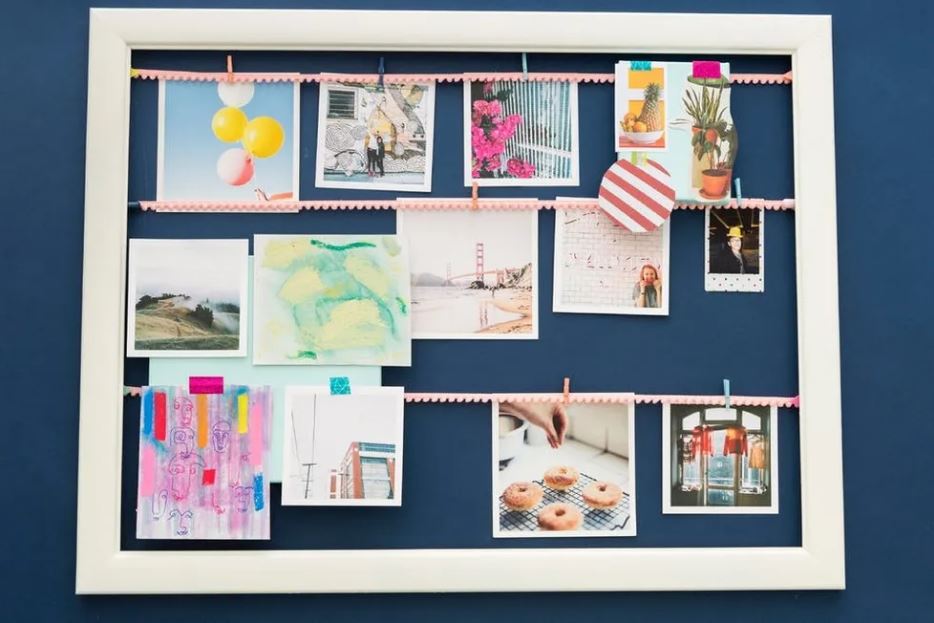
Materials & Tools:
- 18×24-inch frame
- 2 small canvases
- pom-pom trim
- tassel trim
- washi tape
- thumbtacks
- tiny clothespins
- hot glue gun
- scissors
- personal photos/inspo clippings
Instructions:
- Attach the trim to the inside left and right of the frame using a small amount of hot glue.
- For extra security, add a thumbtack to hold the trim in place
- Make sure you think about the size of the photos you will be hanging and leave yourself enough room in between each trim.
- Repeat this process until you have attached your desired number of rows.
- Secure your photos with a paperclip.
- The last step is to add some extra color and texture with the larger pom-pom and tassel trim. Using the hot glue gun, layer the two trims at the bottom of the frame. Go with the tassels first since they lay flat, then added the pom-poms on top.
3. Duct Tape Canvas Art
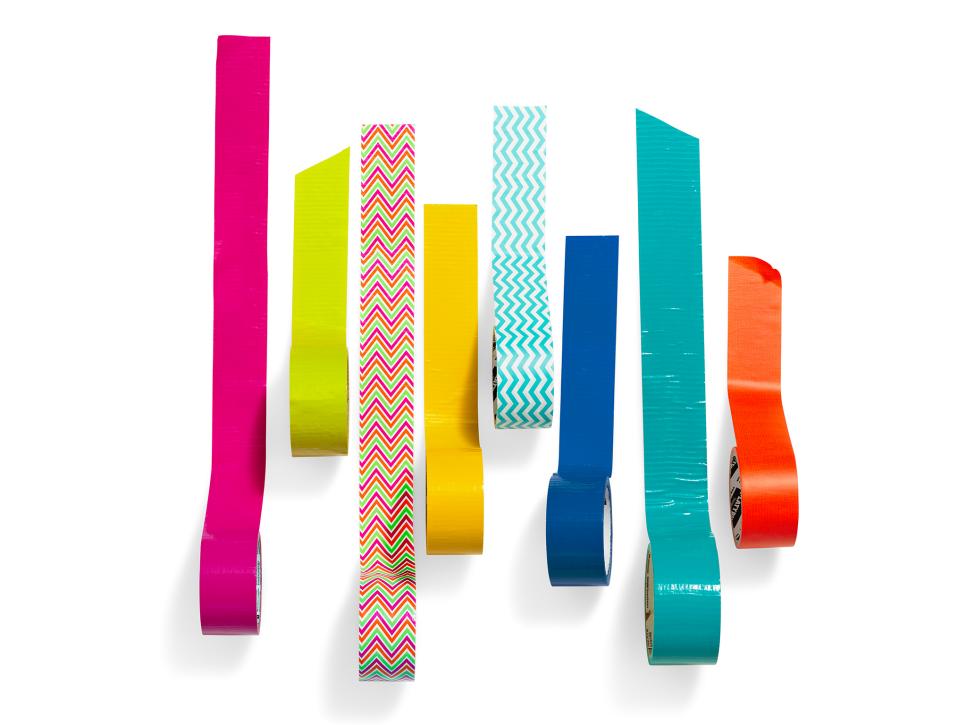
Materials & Tools:
- Canvas
- Scotch patterns
- Colors duct tape
- Ruler
- X-ACTO Knife
- Mat board
Instructions:
- Take a big piece of duct tape and lay it out on a mat board.
- Cut out the end with your Xacto Knife.
- Use a ruler to measure triangles, then cut the triangles with the Xacto knife.
- Take out the triangle and press it on your canvas.
- Wrap the edge of your duct tape around the corner.
- Repeat multiple times, you can even choose to do it with multiple colors.
4. Lite Brite Hearts
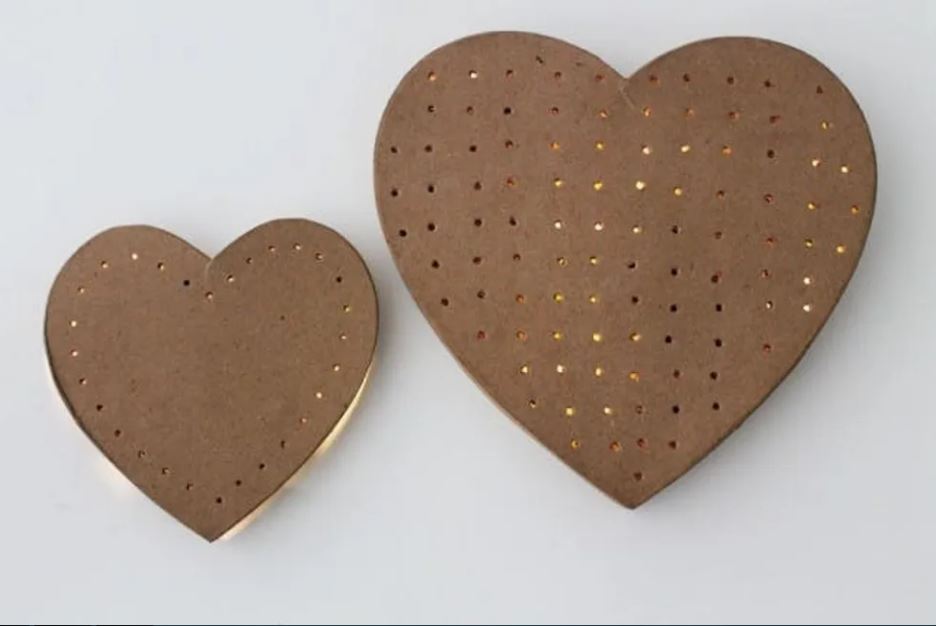
Materials:
- Cardboard box
- LED Lights
Tools:
- Hammer
- Nail
Instruction:
- Gather your materials.
- Draw a pattern on your box lid.
- Use a hammer and nail to punch holes along the line of the pattern.
- Continue until you’re done.
- Tape LED lights into the back of your cardboard box lid.
- Attach your box to the wall.
5. Spray Paint Wall Art
Material:
- Canvas
- gold spray paint
- 3 colors of spray paint
- string
- painter’s tape
- chevron stencil
- lace washi tape
- X-ACTO
Instructions:
First thing to do is spray paint each of your canvases gold. If they weren’t blank to begin with, you might need to do 2 coats. You always want to spray paint outside or in a really well-ventilated space.
Ombre String Pattern
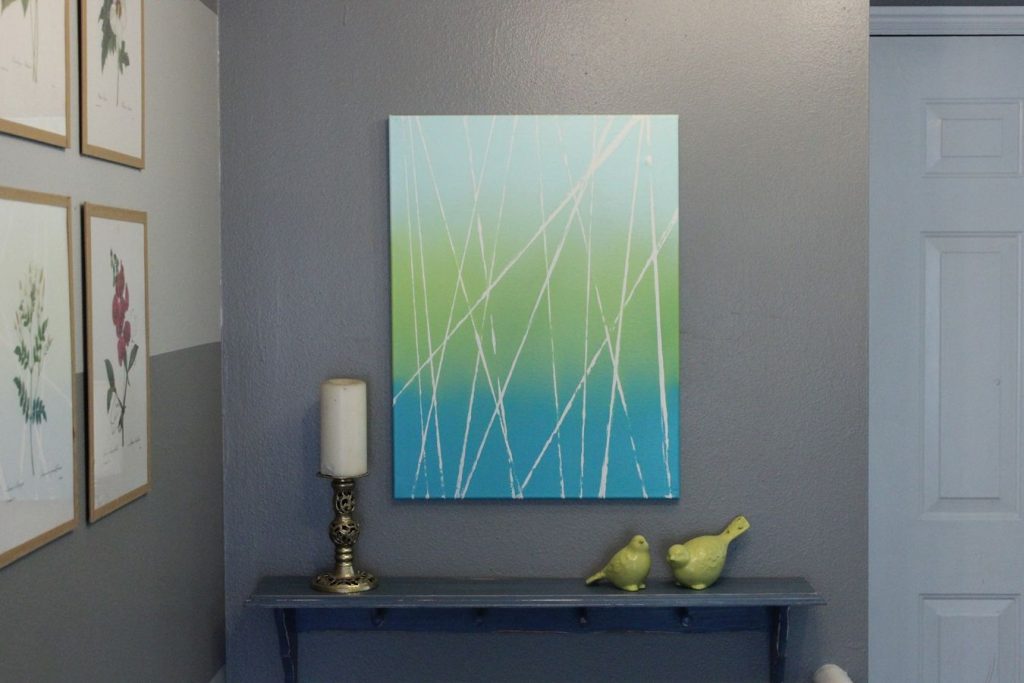
- For this first piece, we wrapped string around a canvas to create a pattern. Simply wrap and tape on the back of the canvas to keep string in place.
- Spray in the ombre pattern you want.
- Unwrap the string.
Chevron Stencil
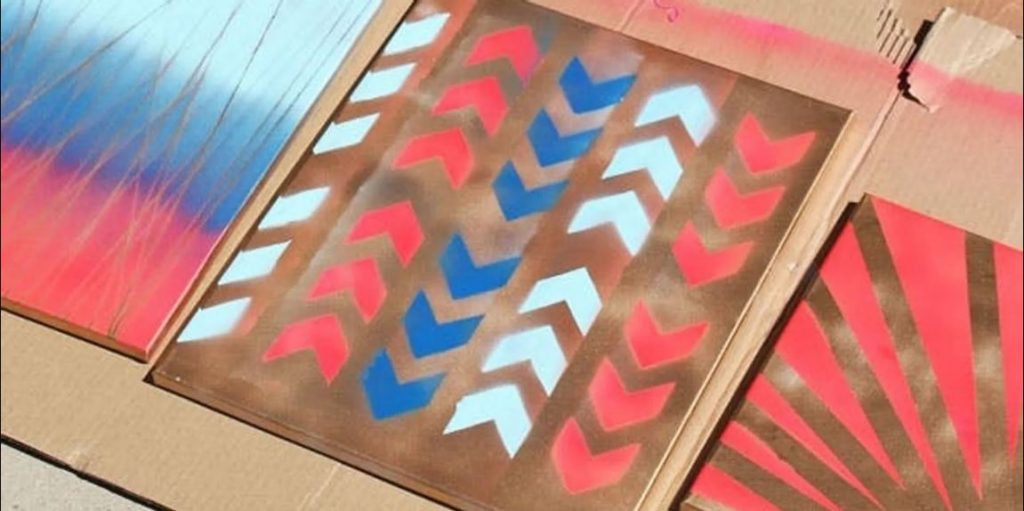
- Print a chevron stencil.
- Cut out your stencil with an X-ACTO knife and tape onto your canvas.
- Spray one stripe and then move your stencil over and repeat with a different color.
6. Wire Word Wall Art
Materials:
- dazzle tac jewelry glue
- paper clamps
- copper electrical wire (the thinnest you can find)
- template
Tools:
- pliers
- needle nose pliers
- wire cutters
- sandpaper
- tape
Instructions:
- Start by printing out a template of the phrase or word you want to spell out. Make sure to print it out around 300-350 font size, and pick a font that is similar to script or cursive.
- To make the copper wire wall art, start by sanding the ends of the copper so they aren’t too sharp.
- Then tape down your template and leaving about 9 inches of wire out
- Clamp the rest in a coil so that it’s easier to use.
- Use the pliers to pinch hard corners when you need to double back the wire.
- Smooth out any kinks and then cut off the excess wire.
- To make the crosses on the “t”‘s, simply cut a small section of wire, fold it in half, and glue it on using jewelry glue (a hot glue gun would work too).
- To make the dot on the “i”‘s, just use the pliers to round a tiny section of wire into a circle. You will have to nail these in separately.
- Remove it from your template, and it’s ready to hang up and enjoy as a daily reminder to be, well, creative!
Which wall art seems the most interesting to you? Tell us in the comment section below!


