
Compost is decayed organic material added to soil to help plants grow better. Materials such as food scraps and yard waste that we usually throw away can be recycles as compost and instead revive your garden. This is an eco-friendly choice, for the materials used in compost are ones usually thrown away and end up in landfills, releasing methane which is a potent greenhouse gas.
Benefits of Composting
- Revitalizes the condition of the soil, retain moisture and limits the risk of plant disease and pests.
- Eliminates the need for chemical fertilizers.
- Creates humus, by encouraging the production of beneficial bacteria and fungi that break down organic matter.
- Reduces methane emissions from landfills and lowers your carbon footprint.
Composting Basics

In total, there are three basic composting ingredients:
Browns – dead leaves, branches, and twigs.
Greens – grass clippings, vegetable waste, fruit scraps, and coffee grounds.
Water – The right amount of water, greens, and browns is important for compost development.
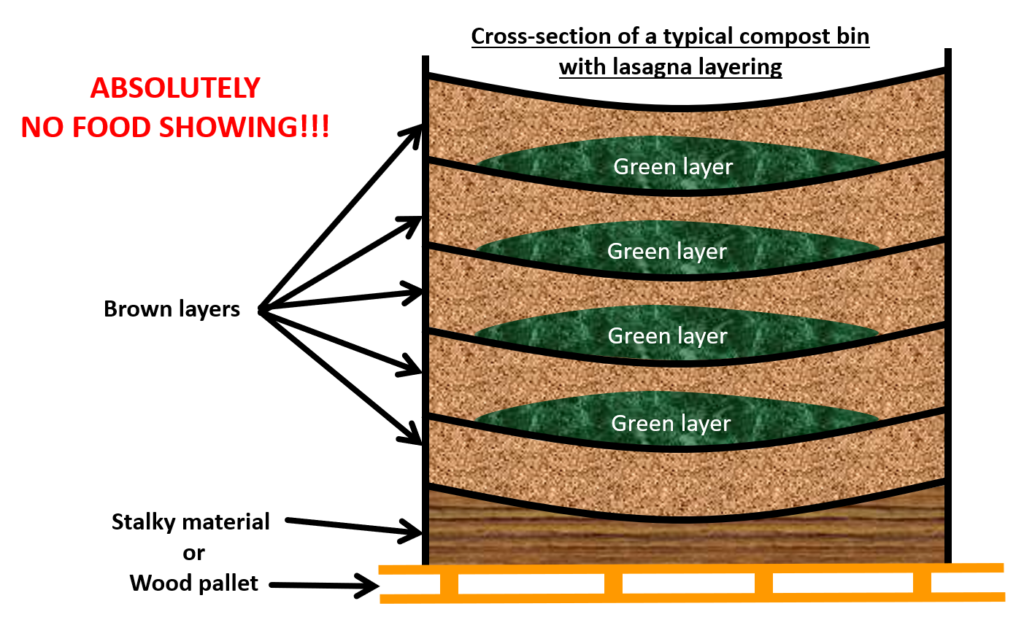
The compost pile should have an equal amount of browns to greens. This is done by alternating layers of organic material that make up the whole composition of the compost. The brown materials provide carbon for your compost, the green materials provide nitrogen, and the water provides moisture to help break down the organic matter.
The existence of an activator is also very much needed in the composting process. This activator is something that is used to speed up the composting process. The activator that is easiest to find is EM4. For composting you can use yellow EM4. But if you still have trouble getting EM4, you can make MOL or local microorganisms. Making MOL is also very simple, we can use bamboo shoots, weevils or banana peels, stale rice, fermented rice washing water and others. In addition, if you have already made compost, semi-cooked compost can also be used as an activator for subsequent composting. Even if you don’t use an activator, the composting process will still happen naturally, only longer. We also have to pay attention to the size of the organic materials we use. The size will greatly affect the speed in the composting process.
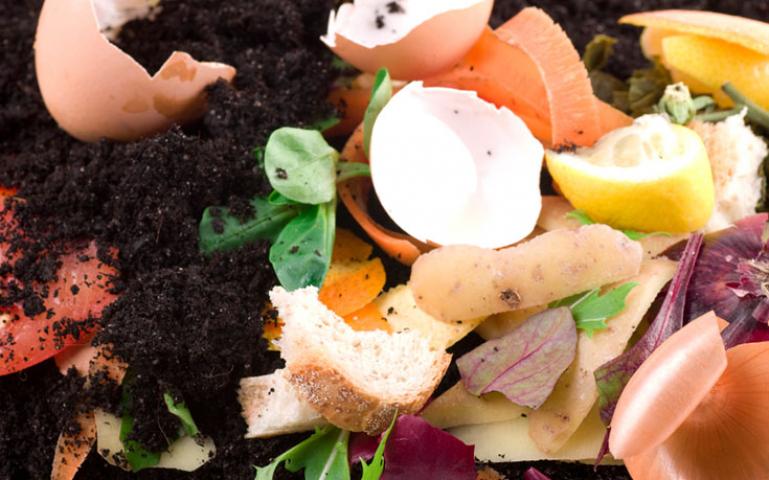
What To Compost
-Fruits and vegetables
-Eggshells
-Coffee grounds and filters
-Tea bags
-Nut shells
-Shredded newspaper
-Cardboard
-Paper
-Yard trimmings
-Grass clippings
-Houseplants
-Hay and straw
-Leaves
-Sawdust
-Wood chips
-Cotton and Wool Rags
-Hair and fur
-Fireplace ashes
What Not To Compost and Why
Black walnut tree leaves or twigs
– Releases substances that might be harmful to plants
Coal or charcoal ash
– Might contain substances harmful to plants
Dairy products (e.g., butter, milk, sour cream, yogurt) and eggs
– Create odor problems and attract pests such as rodents and flies
Diseased or insect-ridden plants
– Diseases or insects might survive and be transferred back to other plants
Fats, grease, lard, or oils
– Create odor problems and attract pests such as rodents and flies
Meat or fish bones and scraps
– Create odor problems and attract pests such as rodents and flies
Pet wastes (e.g., dog or cat feces, soiled cat litter)
– Might contain parasites, bacteria, germs, pathogens, and viruses harmful to humans
Yard trimmings treated with chemical pesticides
– Might kill beneficial composting organisms
Materials You’ll Need to Compost at Home
There are many different ways for you to make your compost pile, but you will be needing some of these items.
Items include:
-pitchforks
-square-point shovels or machetes
-water hoses with a spray head
Types of Composting
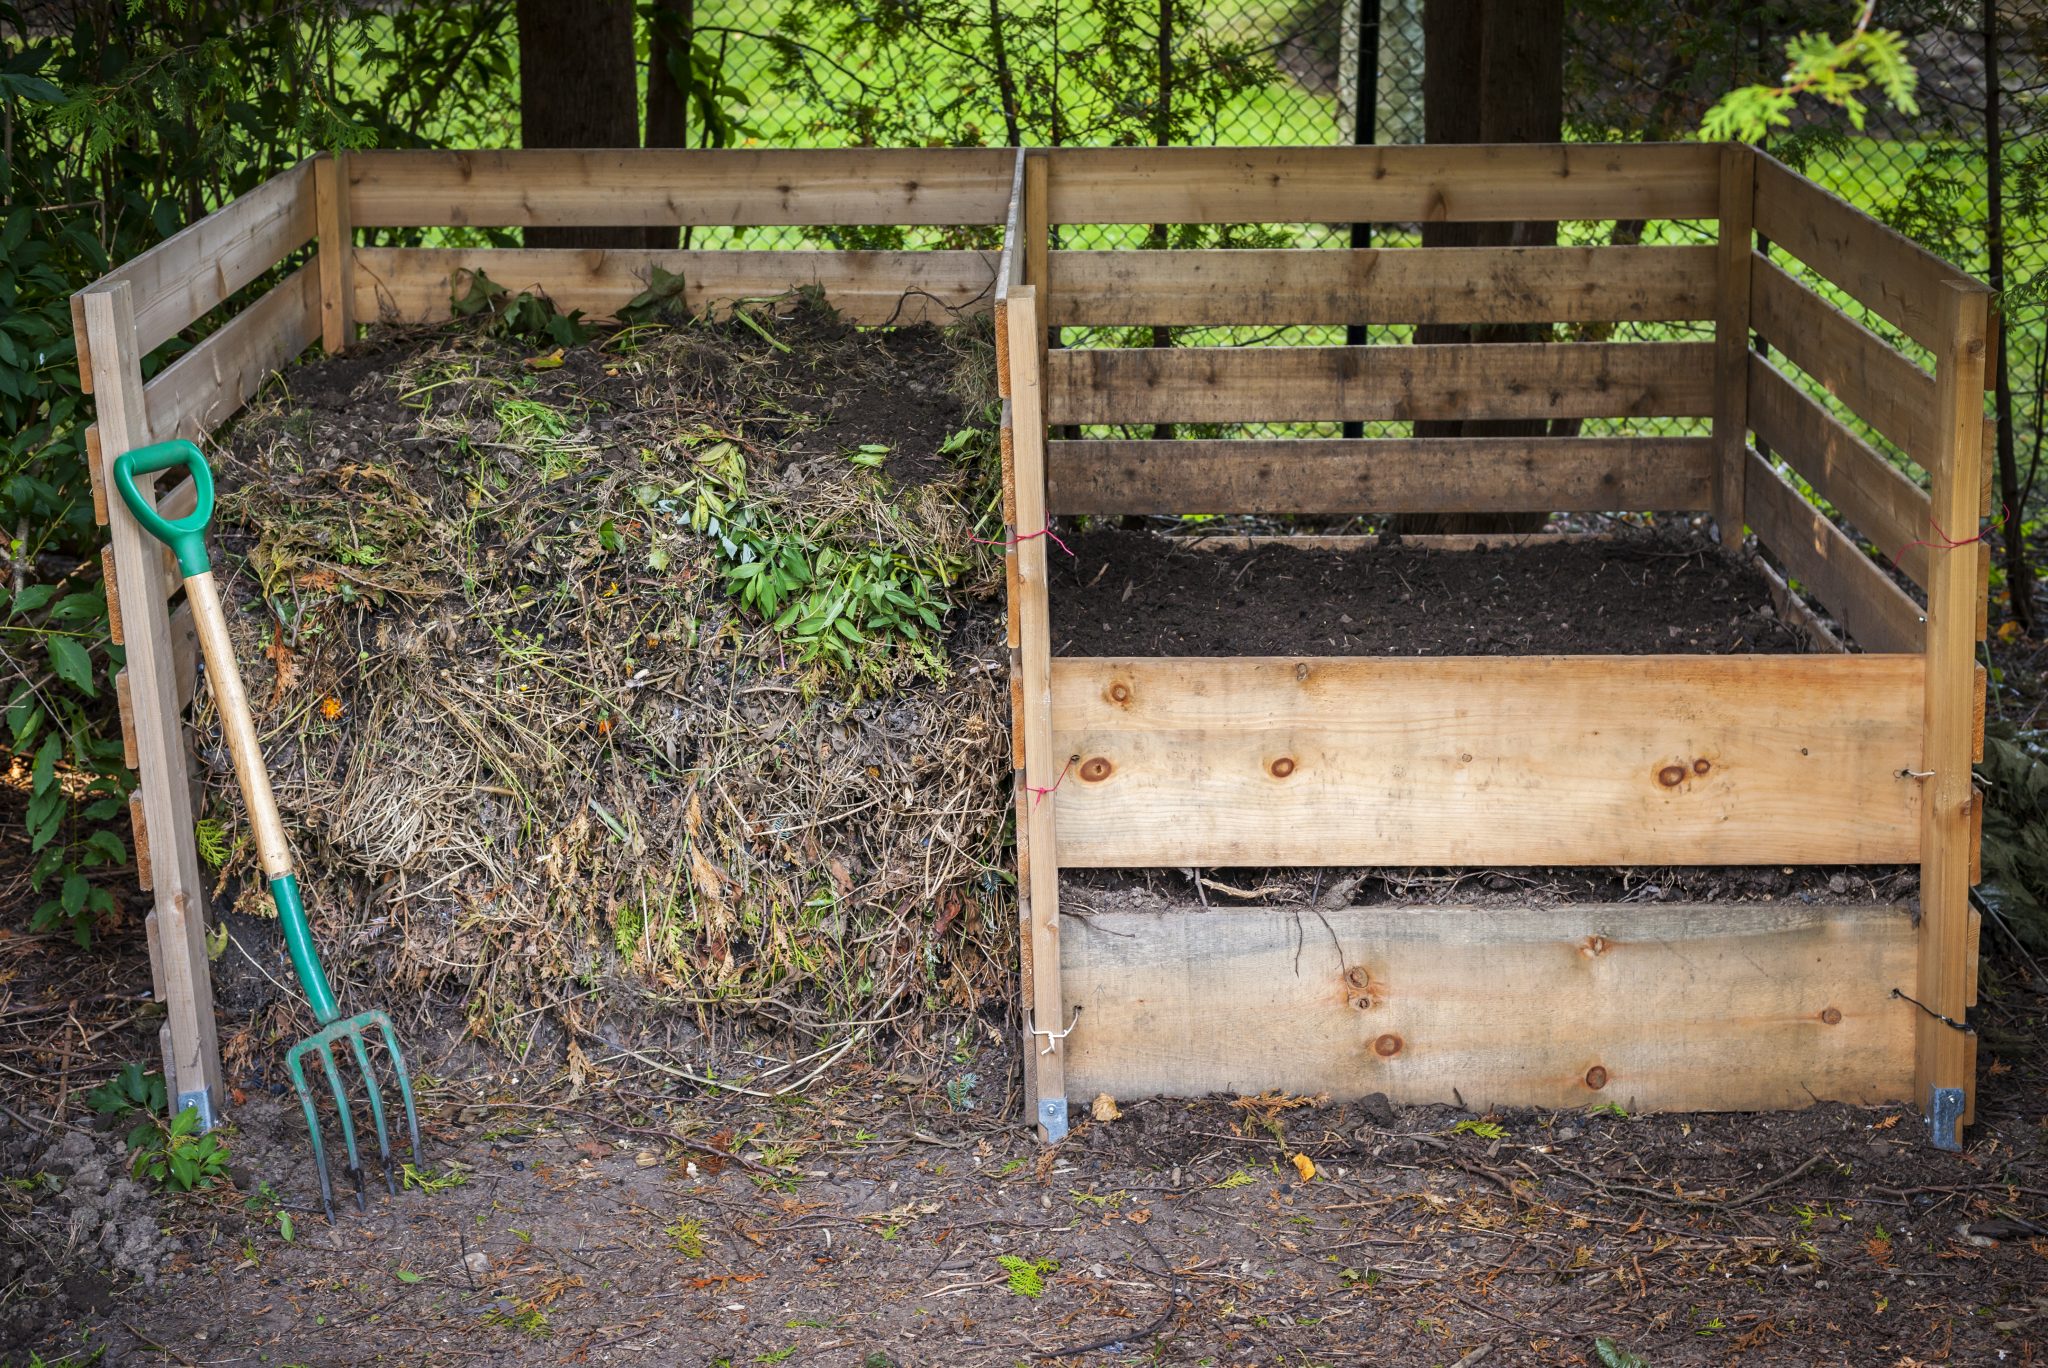
There are two types of composting: cold or hot. Cold composting is collecting yard waste or taking out the organic materials in your trash (such as fruit and vegetable peels, coffee grounds and filters, and eggshells) and then piling it over a bin. The material will decompose over the course of a year or so.
Hot composting may require you to take an active role, but you will also garner faster results within one to three months during the warm weather. In total there are four ingredients are required for fast-cooking hot compost: Nitrogen, carbon, air, and water. These items feed microorganisms, which speed up the process of decay.
Vermicompost, on the other hand, is compost made with worms. The process goes as such: when these worms eat food scraps piled up in the compost, it releases castings, which are rich in nitrogen. Not all worms can be used for compost. You need redworms (also called “red wigglers”) or black soldier fly larvae. Worms for composting can be purchased online or at a garden supplier.
How to Make Hot Compost
Step 1: Combine Green and Brown Materials
You need to have at least materials as much as 3 feet deep before making your hot-compost heap. You are going to want to combine your wet, green items with your dry, brown items. “Brown” materials include dried plant materials; fallen leaves; shredded tree branches, cardboard, or newspaper; hay or straw; and wood shavings, which add carbon. “Green” materials include kitchen scraps and coffee grounds, animal manures (not from dogs or cats), and fresh plant and grass trimmings, which add nitrogen. Start mixing your compost pile with three parts brown with one part green materials. If your compost pile looks too wet and smells, add more brown items or aerate more often. If you see it looks extremely brown and dry, add green items and water to make it slightly moist.
Step 2: Water Your Pile
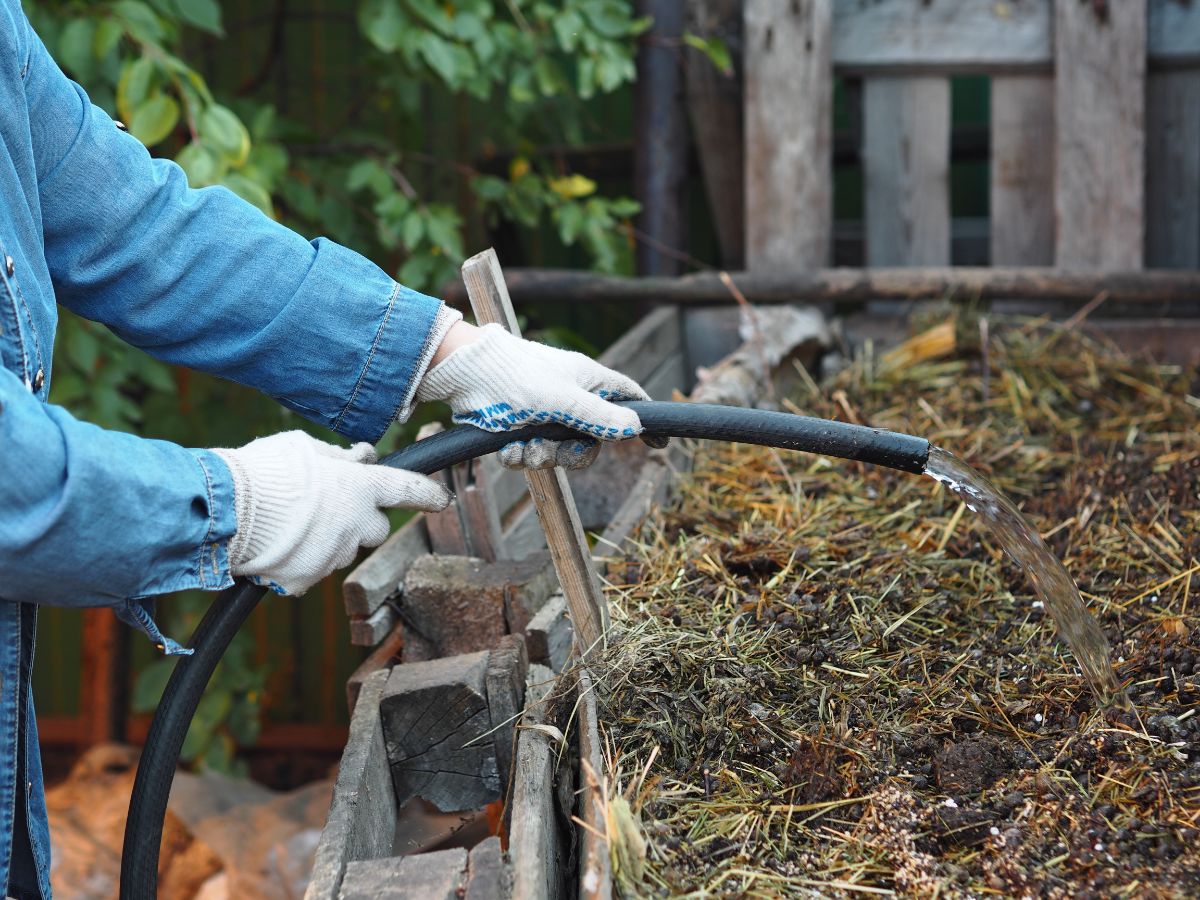
After creating your compost mixture, water it to add moisture. Sprinkle water over the pile regularly so it has the consistency of a damp sponge. Be careful of adding too much water, as the microorganisms in your pile will become waterlogged and drown. If this happens, your pile will rot instead of compost. One way to know whether your pile is decomposing or rotting is to measure the temperature. Use a thermometer to be sure the materials are properly decomposing or reach into the middle of the pile with your hand. Your compost pile should feel warm.
Step 3: Animal Larvae
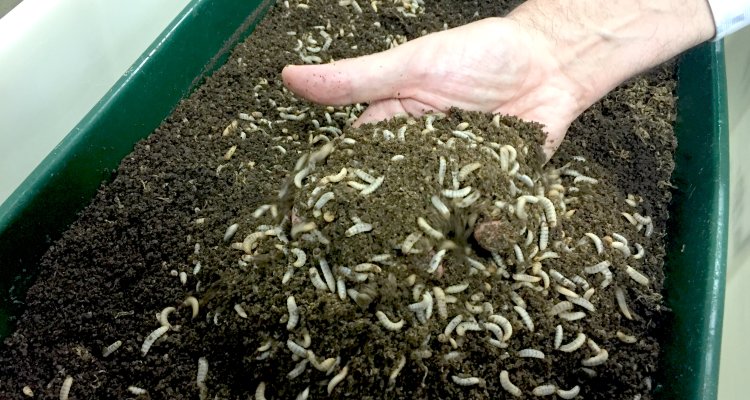
If your pile has signs of microorganisms, it’s a good thing. But you need to make sure the microorganisms are the right ones that need to be in your pile. The BSF flies (Black Soldier Fly) larvae is large. So if what you find is a BSF fly larva, then you got an addition to your compost. BSF fly larvae are indeed responsible for breaking down organic matter. But if what you find are green fly larvae (characterized by their small-sized larvae), you just need to sprinkle the roasted chaff just to anticipate.
Step 4: Stir Up Your Pile
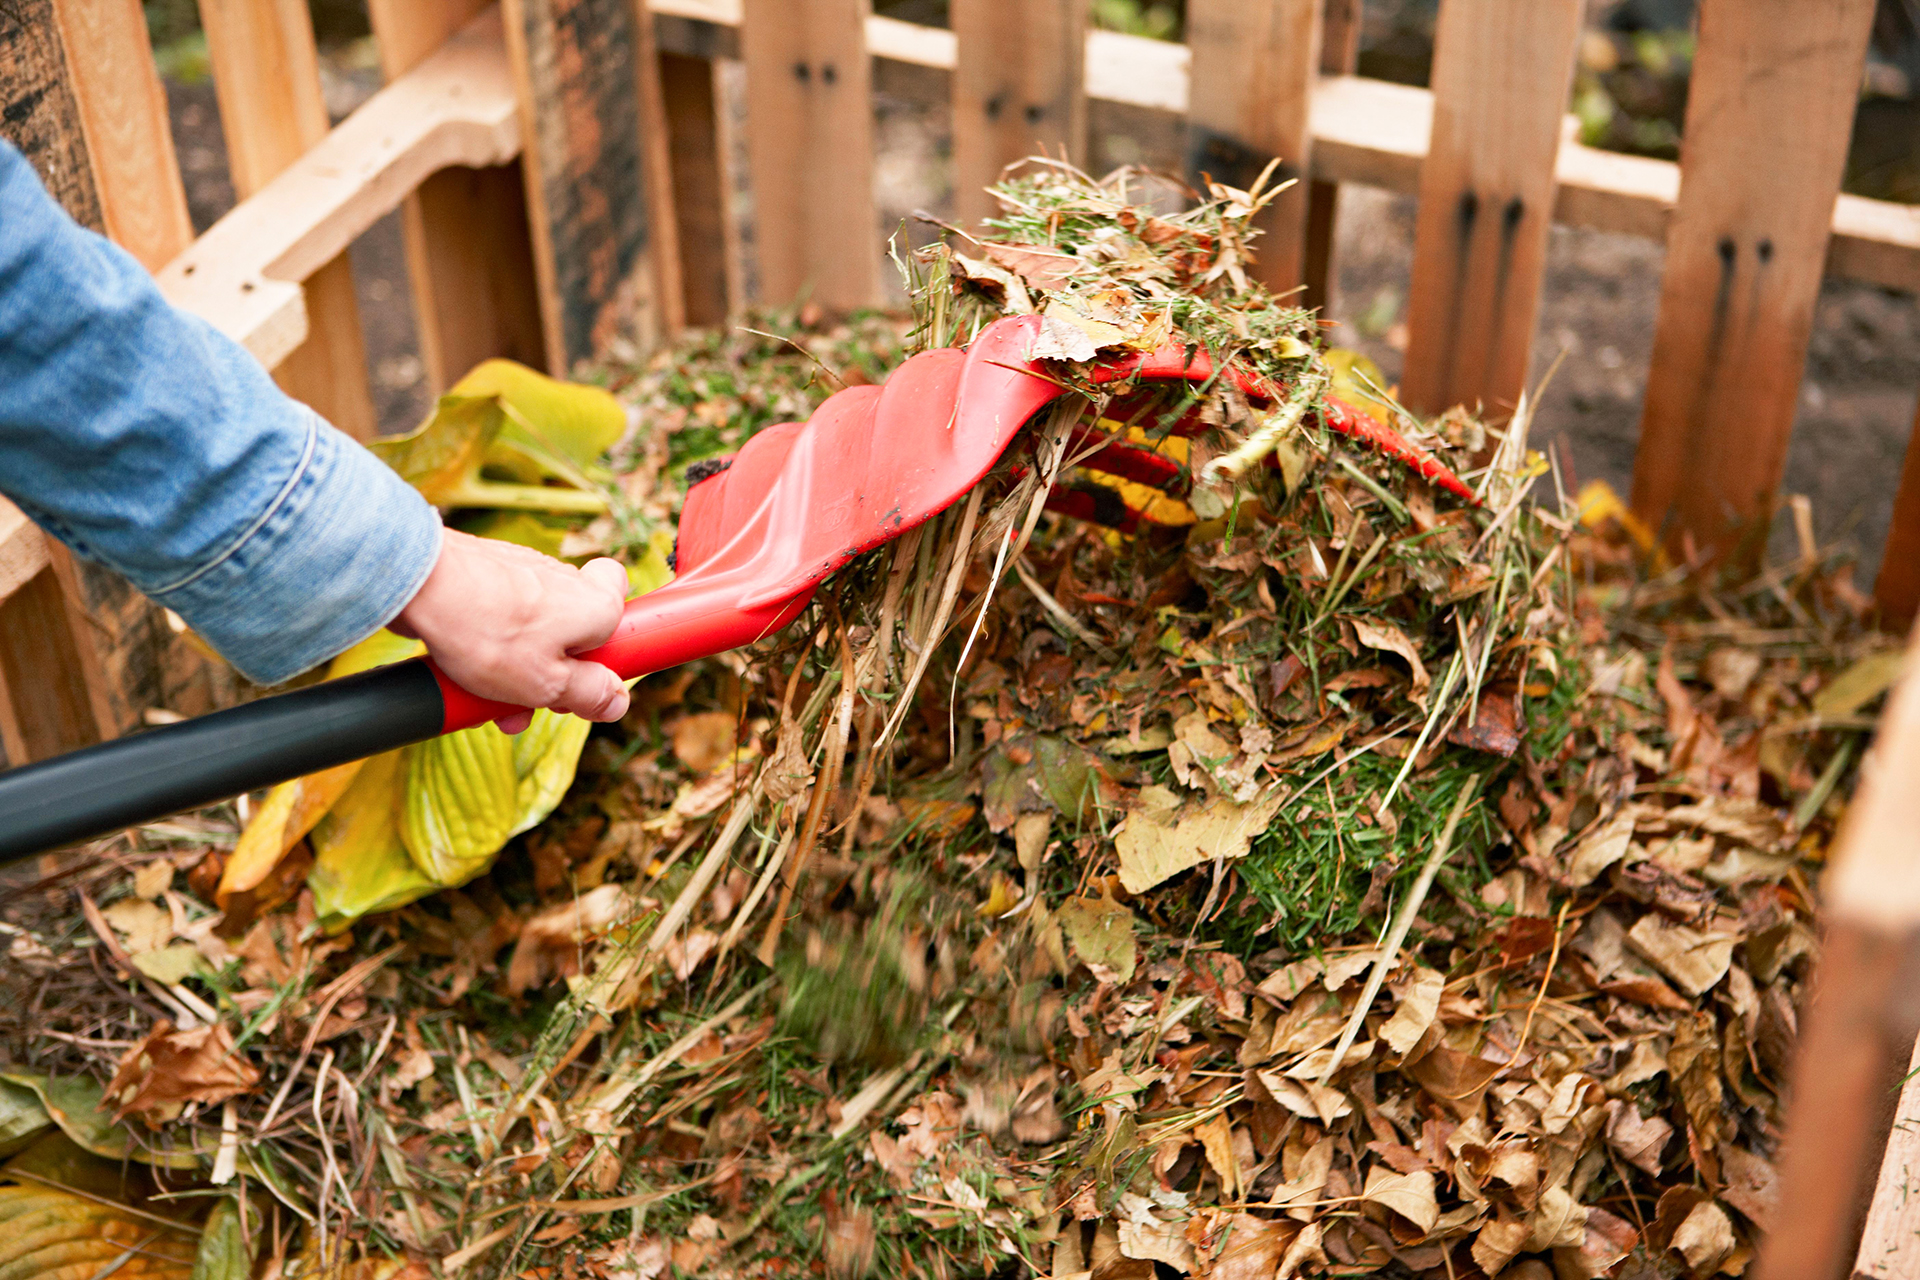
Provide oxygen to your pile by turning it once a week in the composter with a garden fork. The perfect timing to turn your pile of compost is when the center of the pile feels warm or when a thermometer reads between 130 and 150°F. Turning the pile will help it cook faster and prevents the organic material from becoming matted down and developing an odor. At this point, the layers have served their purpose of creating equal amounts of green and brown materials, so it’s safe to stir thoroughly.
The composter we use also contributes to how successful the composting process will be. You can use a bucket with several holes at the bottom as composter, at the bottom we can also put another bucket to accommodate the liquid produced from this composting process, this liquid is called leachate and this can also be used as organic liquid fertilizer (POC). In addition, we can also use the sack as our composter. In essence, we only need a container to accommodate it that can be closed and we just need to give a hole at the bottom so that the compost is not too wet due to leachate buildup.
Tip: In addition to aerating regularly, you can chop and shred raw ingredients into smaller sizes for a faster composting process.
Step 5: Time for Composting Process
The length of time for composting depends on what materials we use as well as the size of the material. So some take only 1 week, 2 weeks, 6 months or even a year. If the materials we use are dominated by high carbon materials, of course the decomposition process will take longer. Shorten the time of the process by reducing the size of the waste we use by cutting it into smaller pieces. We also recommend that when doing the composting process not to add any more materials especially in large quantities and instead use another composter to do the composting.
Step 6: Feed Your Garden
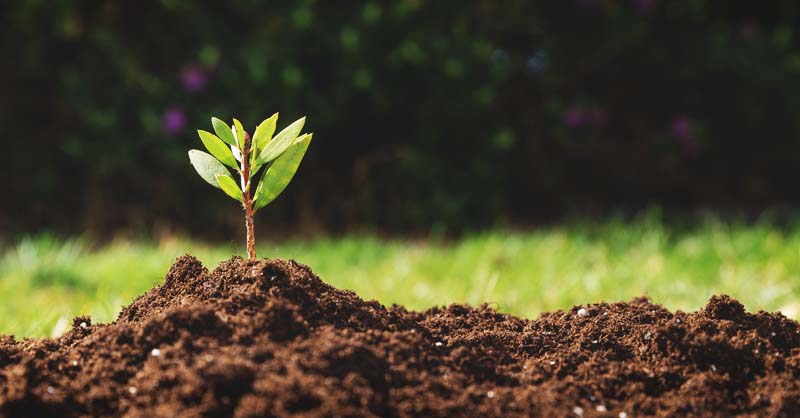
Signs that your compost has been fully decomposed is when it becomes dry, brown, and crumbly. It shows that it’s fully cooked and ready to feed to the garden. If is still a little remnant and you want to use it right away, it is okay because later it will also be broken down again when it is in the planting medium. The finished compost should be left in the planting container before using it for a few days. If you feel that your compost structure is not what you want, you can still add other planting media such as roasted chaffs so that your planting medium that is equipped with compost has the appropriate texture and structure that you want.
The appropriate amount is about 4 to 6 inches of compost to your flower beds and into your pots at the beginning of each planting season.


