
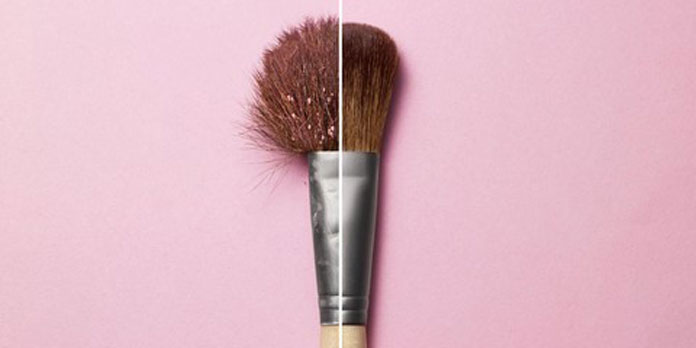
Cleaning your brushes is an important task for any makeup lover, as makeup brushes collect product residue, dirt from the environment, and oil from your skin. If left for a long time, brushes become a breeding ground for germs.
Worrisome bacteria that appear on beauty products (beauty blenders, sponges, etc) and cosmetic products (lipsticks, eyeliners and mascaras) include Staphylococcus aureus, E. coli, and Citrobacter freundii (bacteria that can cause skin infections, food poisoning, and urinary tract infections).
For makeup sponges, in particular, have been found to contain a significant amount of Enterobacteriaceae. This large family of bacteria includes Salmonella, which produces endotoxins. The effects of being infected by these bacteria include fever, muscle pains, and other symptoms.
Not only that, but dampening beauty blenders before using it can encourage fungus to grow. This can be a catalyst for fungal skin infection.
Even worse is the habit of putting makeup items in the bathroom. As the bathroom is a location for *certain* activities, your makeup could be contaminated with aerosolized fecal matter.
Cleaning your brushes is therefore an important step. Optimize your makeup application and maintain the hygiene of your makeup products, brushes and sponges by doing a deep-clean.
Here is how to do it:
How to clean bristle makeup brushes
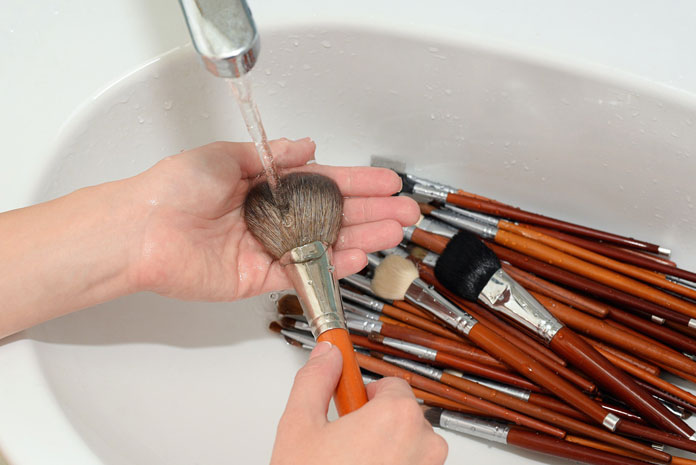
1. Wet The Bristles
The first step is to wet the bristles of your brush. Turn the water tap on, then ensure that the water is lukewarm. The next step is to rinse the tips of the brushes underneath, rather than completely submerging the whole brush. If you have the habit of doing this, refraining would be better since it could weaken the glue connecting the head to the handle.
2. Wash The Head
Next step is to wash the brush. Add a tablespoon of gentle or clarifying shampoo to a bowl of lukewarm water, dip the bristles of the brush into the bowl and gently massage the bristles for a few minutes.
Note: Do not use dish soap as it can be too harsh on your brushes, removing all traces of natural grease from the bristles on your brush.
3. Rinse All Residue
After your brush is covered in soap, hold it under lukewarm running water and gently rinse. Do this until there is not remaining lather. Remember to focus on the tips of the brush and try to avoid the head, where the glue could disintegrate.
4. Repeat As Needed
Now that it seems clean, check the brush for any residue left. If you find some makeup, dirt or debris hidden in the brush then repeat the process to completely clean your brush.
5. Air-Dry
Prepare towels, dry paper towels or a clean microfiber cloth to dry your brushes. The towel is to be placed on a flat surface, while the rest could be used to squeeze moisture from the brush head. The damp brushes are placed separately on the towel so it can air-dry completely.
If you can put it in a downward angle, that would be better. This will encourage water to flow away from the handle as it can rot the wooden handle or even remove glue.
How to clean beauty blenders/sponges
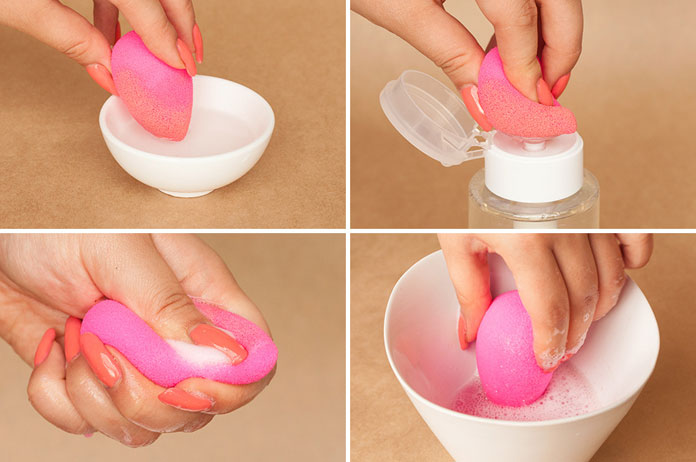
1. Wet The Sponge
Again, run lukewarm water over your sponge/beauty blender. Continuously squeeze it until it’s thoroughly wet.
2. Squeeze & Massage
Use a gentle soap or clarifying shampoo to add a few drops on the sponge. Then, squeeze the sponge/beauty blender to get the makeup out of the center and until it forms a lather.
3. Rinse Away All The Bubbles
Now that it has lathered, put the beauty blender under lukewarm running water and squeeze continuously until no bubbles form.
4. Repeat Until Satisfactory
Check the cleanliness of your beauty blender. If you squeese and the water looks clean, then it is good to go. If there is still makeup residue, repeat the process from start.
5. Dry
Finally, remove as much water as you can by squeezing the beauty blender. Then put the sponge or beauty blender in a room with circulating air to air-dry.
Best cleaners to use
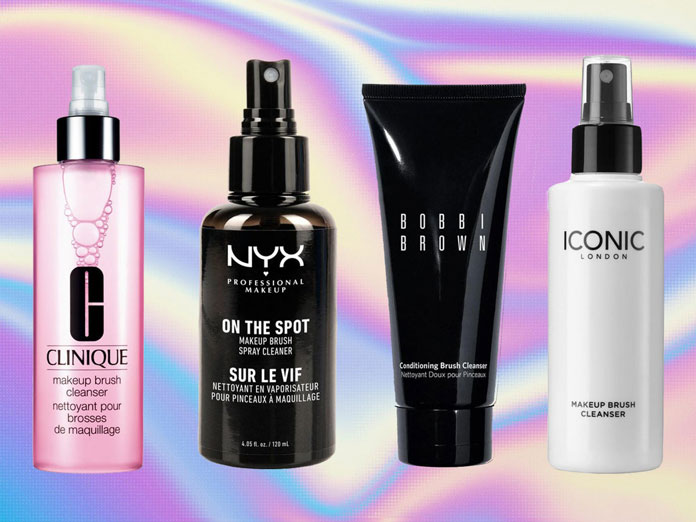
When it comes to cleaning brushes, there are a couple of cleanser options to clean your brushes without creating long-term damage to the brushes.
Here are some options you can choose from:
- Gentle shampoo
When it comes to choosing a cleanser, the ideal choice would be gentle shampoos. Using regular soap can damage and dry out bristles made with natural hair. On the other hand, using shampoo is gentle enough, removes the dirt and makeup while preventing us from breaking the bank.
- Commercial makeup brush cleanser
However, if you’ve invested a considerable amount of money on your makeup brushes, then you might consider a specially formulated professional makeup brush cleanser. Though this is the most expensive option, it’ll clean your brushes and sponges with minimal damage.
- Soap
Some may think that antibacterial soap is more effective, as it can help eliminate the nasty bacteria in your brushes. Yet to the US FDA (Food and Drug Administration), it is no better than regular soap for preventing illness. Additionally, it might even contain ingredients that could irritate your skin.
Best way to store your makeup brushes
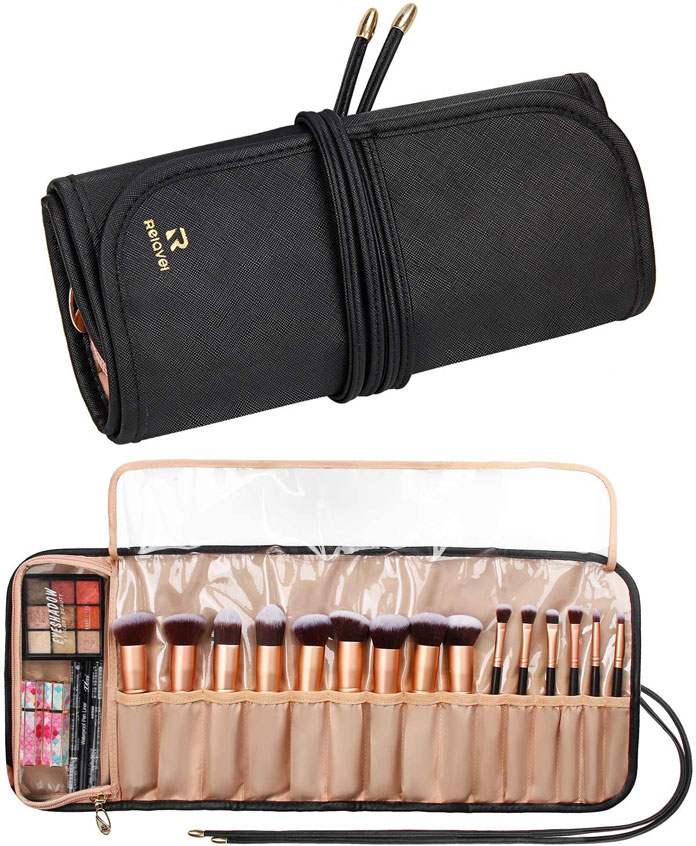
Storing your makeup brushes also require special attention. It would not be wise to dump everything together in your makeup bag, for this can damage the bristles and attract dirt and bacteria.
Protect your brushes by getting a makeup brush roll. Rather than the traditional makeup bag which mixes all the brushes, a brush rolls contains individual slots to place each brush. This means you can easily know and find the brush you want, while the brushes stay separated from each other.
Can you share makeup brushes?

For the sake of your skin, sharing makeup brushes is definitely something you should not do. Using the same brushes for a variety of skin types increases the chances of getting an infection from these brushes. In particular, lip and eyeliner brushes are especially risky for whoever uses these tools could get an infection from the herpes simplex virus (HSV).
When should you replace your makeup brushes?
Replacing your brushes depends on the fullness and softness of your bristles. If your brushes are getting thinner or are looking worn, it might be time to toss it away. Higher quality brushes lasts a couple of years with regular use, while more wallet-friendly brushes generally lasts for a couple of months.


